
create digital product· BestStartBiz.com
How to Create a Digital Product to Sell Online: A Complete Beginner’s Guide
Digital products are one of the most powerful income opportunities available to first-time creators — and the gap between “I have a skill” and “I have a product for sale” is far smaller than most people assume.
A digital product is any file or piece of content that can be delivered electronically: a PDF guide, a Canva template, a spreadsheet, an ebook, a video course, a Lightroom preset, or a music track. Once created, it costs nothing to reproduce and can be sold to an unlimited number of buyers without any additional work on your part.
This guide walks you through every step of creating your first digital product — from choosing the right format for your skills, to building it with free tools, to getting it ready for sale. By the end, you’ll have a clear path from idea to published listing.
Which type of digital product fits your skills, how to validate demand before building, which free tools to use for each product type, how to create a product buyers will rave about, and the pre-launch checklist to complete before going live.
Why Digital Products Are the Best First Product Business
Physical products require inventory, storage, packaging, and shipping. Service businesses require your ongoing time and presence. Digital products require neither, and that’s what makes them uniquely powerful for solo creators starting from scratch.
Here’s the economic reality of digital products compared to alternatives:
| Business type | Startup cost | Cost per sale | Scales without you? | Income while you sleep? |
|---|---|---|---|---|
| Digital products | $0–$50 | $0 | Yes | Yes |
| Physical products | $500–$5,000+ | Materials + shipping | With staff | Limited |
| Freelance services | $0 | Your time | No | No |
| Dropshipping | $100–$1,000 | Product cost + fees | Partially | Partially |
| SaaS/software | $10,000+ | ~$0 | Yes | Yes |
Digital products combine the zero marginal cost of software with the low startup cost of freelancing. That combination is rare and powerful — which is why digital products are the foundation of most successful solopreneur businesses.
→ Related: Passive income with digital products: a beginner’s guide · 15 passive income ideas you can start with $0
Step 1 — Choose the Right Type of Digital Product
The right digital product for you is determined by two things: the skills you already have, and the format that best solves your target buyer’s problem. Here are the main categories with honest assessments of each.
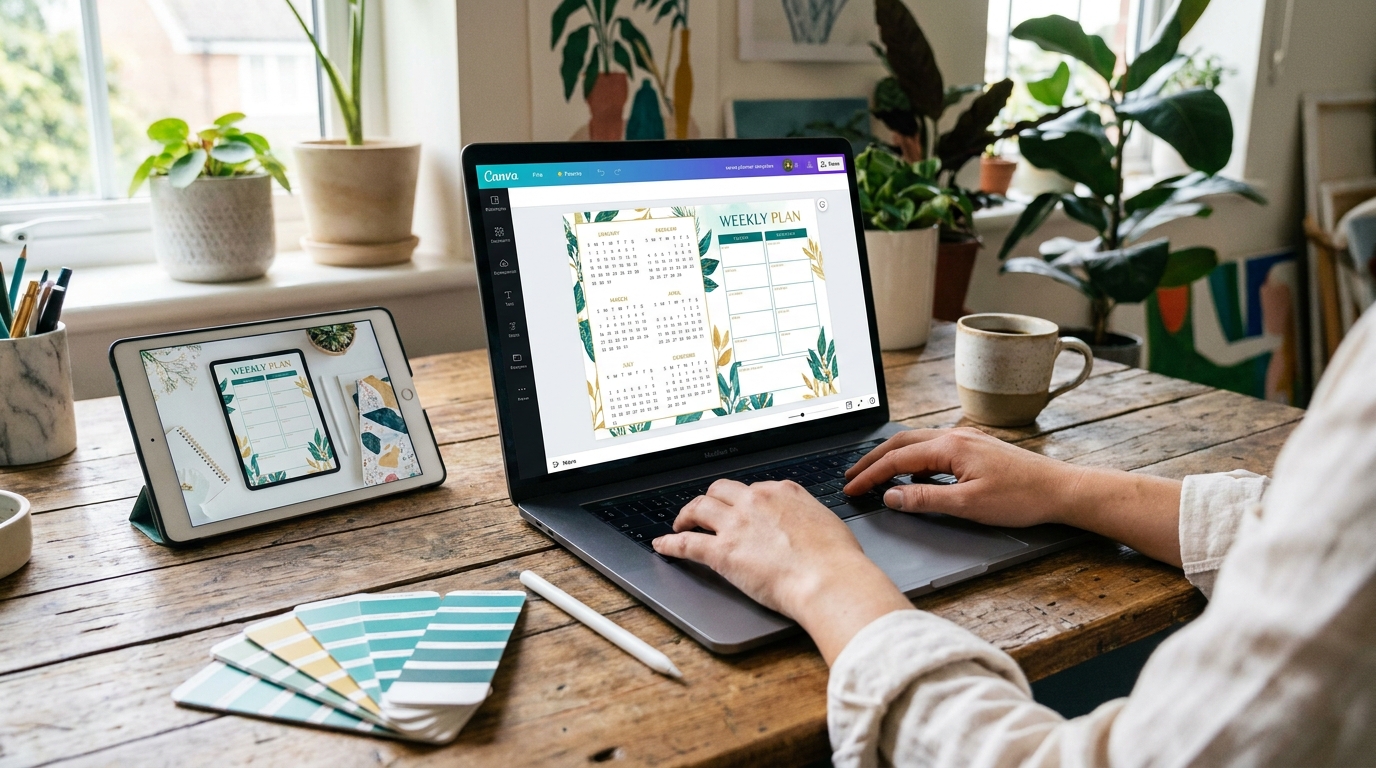
Canva Templates
Editable design files — Instagram posts, media kits, pitch decks, planners, resumes, presentations — that buyers customise with their own content. Consistently among the top-selling digital product categories on Etsy.
Printable PDFs (Planners, Trackers, Worksheets)
Budget trackers, weekly planners, habit trackers, meal planners, kids’ worksheets, wall art prints. Buyers download and print at home. One of the lowest-effort product types with strong repeat purchase potential.
Ebooks and PDF Guides
Comprehensive guides on a topic your target buyer needs to understand. Could be a how-to guide, a recipe collection, a business framework, a study guide, or a reference document. Works especially well when you have genuine expertise in a niche.
Spreadsheet Templates
Google Sheets or Excel templates for budgeting, business tracking, content calendars, project management, or social media analytics. Strong demand from small business owners and freelancers willing to pay $10–$40 for a well-built tracker.
Mini Online Courses and Video Trainings
A structured series of video lessons teaching a specific skill or process. The highest per-unit revenue of any digital product format, but requires the most creation effort. Pre-sell before recording to validate demand.
Stock Assets (Photos, Music, Fonts, Presets)
Photography, illustration, music loops, Lightroom presets, or typefaces licensed for commercial use. Upload once to stock platforms and earn royalties every time someone downloads your asset. True set-and-forget passive income.
If you have design skills → Canva templates or printables. If you have subject expertise → PDF guide or mini course. If you have photography or music → stock assets. If you have data/analytical skills → spreadsheet templates. When in doubt, start with the format that requires the fewest new skills to create — execution speed matters more than format optimisation for your first product.
Step 2 — Validate Demand Before You Build Anything
The most common reason digital products fail to sell is simple: nobody was looking for them. Before spending hours creating, spend 30 minutes confirming that real people are searching for or buying what you plan to make.
Search Etsy like a buyer.
Go to Etsy, search for your product type, and sort results by “Bestseller.” If you see products with 500+ reviews in your category, demand is proven. This is the fastest and most reliable demand signal for digital product creators. Pay attention to what the top sellers include, how they’re priced, and — critically — what buyers complain about in their reviews. The complaints are your product brief.
Check Google search volume.
Use free tools like Ubersuggest or Google Keyword Planner to see how many people search for your product type each month. A keyword with 200–2,000 monthly searches and low competition is a strong signal. No search volume at all suggests a repositioning is needed.
Ask your target buyer directly.y
Post in a Facebook Group or Reddit community where your target buyer spends time. “I’m creating a
for [specific audience] — would this be useful to you?” Real responses from real people in minutes, free, and more reliable than any market research report.
→ Related: How to validate a business idea before spending any money · Keyword research for beginners: how to find topics people actually search for
Creators who skip validation spend weeks building a product, list it, and get zero sales — then assume the problem is their marketing or their pricing. Often, the problem is that nobody wanted the product in the first place. Thirty minutes of validation saves weeks of wasted creation time.
Step 3 — Plan Your Product Before You Build It
Before opening Canva or Google Docs, write a one-paragraph product brief. This keeps you focused during creation and becomes the basis for your listing description later.
Your product brief should answer:
- Who is this for? — Be specific. “Small business owners who manage their own Instagram” is better than “anyone who uses social media.”
- What problem does it solve? — The more specific the problem, the more eagerly the buyer purchases. “Saves 3 hours of design work per week” beats “helps with social media.”
- What exactly is included? — List every deliverable. This becomes your listing’s “what’s included” section.
- What format and file type? — PDF, Canva link, Google Sheets link, MP4, ZIP file. Decide now so you can design accordingly.
- What price will you charge? — Set this before you start building. It influences how much you include and how you position the value.
→ Related: How to price your first digital product (without undercharging)
Step 4 — Build Your Product Using Free Tools
You do not need paid software to create a professional, sellable digital product. Every tool listed here is free and capable of producing output that competes with Etsy listings priced $30–$50.
Canva (canva.com — free)
Canva’s free tier gives you access to thousands of templates, fonts, graphics, and layout tools. For digital products, use it to design your template pages, printable layouts, ebook covers, and instruction documents. When sharing Canva templates with buyers, use the “Share template link” feature — this gives buyers their own editable copy without accessing your original.
- Set your page dimensions to match your product (A4 for printables, 1080×1080px for Instagram templates)
- Use consistent fonts and colours throughout — inconsistency is the most common sign of an amateur product
- Export printables as PDF Print (highest quality) and templates as shareable Canva links
Google Docs → Canva (both free)
Write your content in Google Docs first — it’s easier to draft and edit in a word processor than in a design tool. Once your content is finalised, create the designed layout in Canva using a document template (A4 or US Letter). Copy your text into the Canva layout, add your branding, cover design, and section headers, then export as PDF Standard.
- Always include a cover page, a table of contents for guides over 10 pages, and a “how to use this guide” introduction
- Keep body text at 11–13pt and section headers at 16–20pt for comfortable reading
- Add a branded footer with your website URL on every page
Google Sheets (free)
Build your spreadsheet in Google Sheets and share it with buyers as a link that creates their own copy when clicked (“File → Share → Anyone with the link → Viewer” — buyers then go to File → Make a copy). Use conditional formatting, dropdown menus, and colour-coded sections to make your spreadsheet feel polished and professional. Lock the formula cells so buyers can’t accidentally break the calculations.
- Include a “Start here” tab with instructions before the main tracker tabs
- Add example data in grey text so buyers understand how to fill it in
- Test on both Google Sheets and Excel before listing — ensure compatibility
Loom (free for up to 25 videos) + Google Slides (free)
Create your slide deck in Google Slides, then record yourself presenting using Loom. Loom records your screen and face simultaneously and automatically generates a shareable link. For a mini course, aim for 5–10 videos of 5–15 minutes each. Host the video links in a private Google Doc or Notion page and give buyers access after purchase.
- Record in a quiet room with good natural light — production quality matters more for video than any other product format
- Edit nothing on your first course — imperfect videos that exist are better than perfect videos that don’t
- Use Gumroad or Teachable (both free to start) to host and deliver course access links
Step 5 — Make Your Product Easy to Use
The most common negative review on any digital product is some variation of “I couldn’t figure out how to use it.” This is almost always preventable with one additional deliverable: a clear instruction document.
For every digital product you create, include a one-to-two page instruction PDF that covers:
- How to access the product — for Canva templates, how to click the template link and get their own editable copy; for Google Sheets, how to make their own copy
- A quick overview of what’s included — which pages, tabs, or sections are in the product
- How to customize the most important elements — changing fonts, colors, and placeholder text in Canva; entering data in a spreadsheet tracker.
- Your contact information for support — a simple email address or Etsy message link
- Your website or other products — a gentle cross-promotion at the bottom of the instruction page
Creating a clear instruction document takes 30–60 minutes. In return, it eliminates the most common negative review, reduces support messages, and improves your buyer’s experience enough to increase the likelihood they’ll leave a positive review and recommend your shop to others. No single 60-minute investment pays better dividends in digital product selling.
Step 6 — Create Your Product Images
On any digital marketplace, your product images do the selling before a buyer reads a single word of your description. Buyers scroll quickly — your images have 1–2 seconds to catch their attention. This is where most beginner sellers underinvest.
Every digital product listing should have at least 8 images. Here’s exactly what to include:
| Image | Purpose | What to show |
|---|---|---|
| Image 1 | Stop the scroll | Clean, high-contrast cover with product name and key benefit. This is what buyers see in search results. |
| Images 2–4 | Show the product | Individual pages, templates, or sections — show enough to convey quality and completeness |
| Image 5 | Lifestyle mockup | Product shown in context — displayed on a screen, printed, on a desk, or shown being used. Canva’s free mockup templates work perfectly. |
| Image 6 | What’s included | A flat list or visual breakdown of every item in the product — number of templates, pages, tabs, or videos |
| Image 7 | Before/after or result | What does the buyer’s situation look like after using your product? Illustrate the transformation. |
| Image 8 | How it works | 3–4 step visual showing how to get started: purchase → download → open → customize |
Create all product images in Canva using a consistent template — same fonts, same colors, same style across all 8 images. Cohesive image sets convert significantly better than mismatched ones.
Step 7 — Pre-Launch Checklist
Before publishing your listing, work through this checklist. These are the items most commonly missed by first-time sellers — and the ones most likely to cost you sales or trigger negative reviews.
- Download your own product and confirm every file opens correctly
- Click your own Canva template link and confirm a new editable copy is created (not access to your original)
- Check that your Google Sheets template creates a copy correctly when a new user clicks the link
- All pages, tabs, and sections are complete — no placeholder text or empty sections remain
- The instruction document is included and accurate for the current version of the product
- All 8 listing images are created and exported at the correct dimensions
- Product title includes primary keyword at the start (for Etsy SEO)
- Listing description covers: what’s included, who it’s for, how to use it, and file format
- All 13 Etsy tags are filled in with keyword phrases (not single words)
- Price is set at or above the midpoint for your product category
- Shop policies clearly state no refunds on digital downloads
- Your email address or support link is visible in the instruction document
→ Related: How to sell digital products on Etsy: the complete beginner’s guide
After Launch: Your First 30 Days
Publishing your listing is the beginning, not the end. Here’s what to focus on in the first 30 days to give your product the best chance of gaining traction:
Day 1–7: Announce and drive initial traffic
Tell everyone you know — personal network via text and social media, 2–3 relevant online communities (following their self-promotion rules), and create your first 3–5 Pinterest pins linking to the listing. Your first few sales from warm contacts are valuable primarily because they lead to your first reviews.
Day 8–21: Optimize based on data
Check your Etsy Shop Stats. If you’re getting views but no sales, the problem is your images or price — not your product. If you’re getting almost no views, the problem is your title and tags — not your images. These are different problems with different fixes. Change one thing at a time so you know what moved the needle.
Day 22–30: Plan your second product
Your second product benefits from everything you learned creating the first. Read every buyer message, every review, and every question you received. The most common question is about your next product. The most common complaint is your next improvement. Build product two while product one is still building momentum.
“Your first product is a proof of concept. Your second product is a business.”
→ Related: How to sell digital products on Etsy: the complete beginner’s guide · How to price your first digital product (without undercharging) · Etsy vs Shopify vs Gumroad: which platform is best for selling digital products? · How to build an email list from zero
🚀 Get Your First Digital Product Live in 30 Days
Download our free 30-Day Product Launch Roadmap — a day-by-day action plan covering idea validation, product creation, listing setup, and your first sale. One clear task per day, no experience required.
Download the Free Roadmap →